Piezo Buzzers

Understanding Piezo Buzzers: How They Work and How to Use Them in Electronics Projects
Introduction
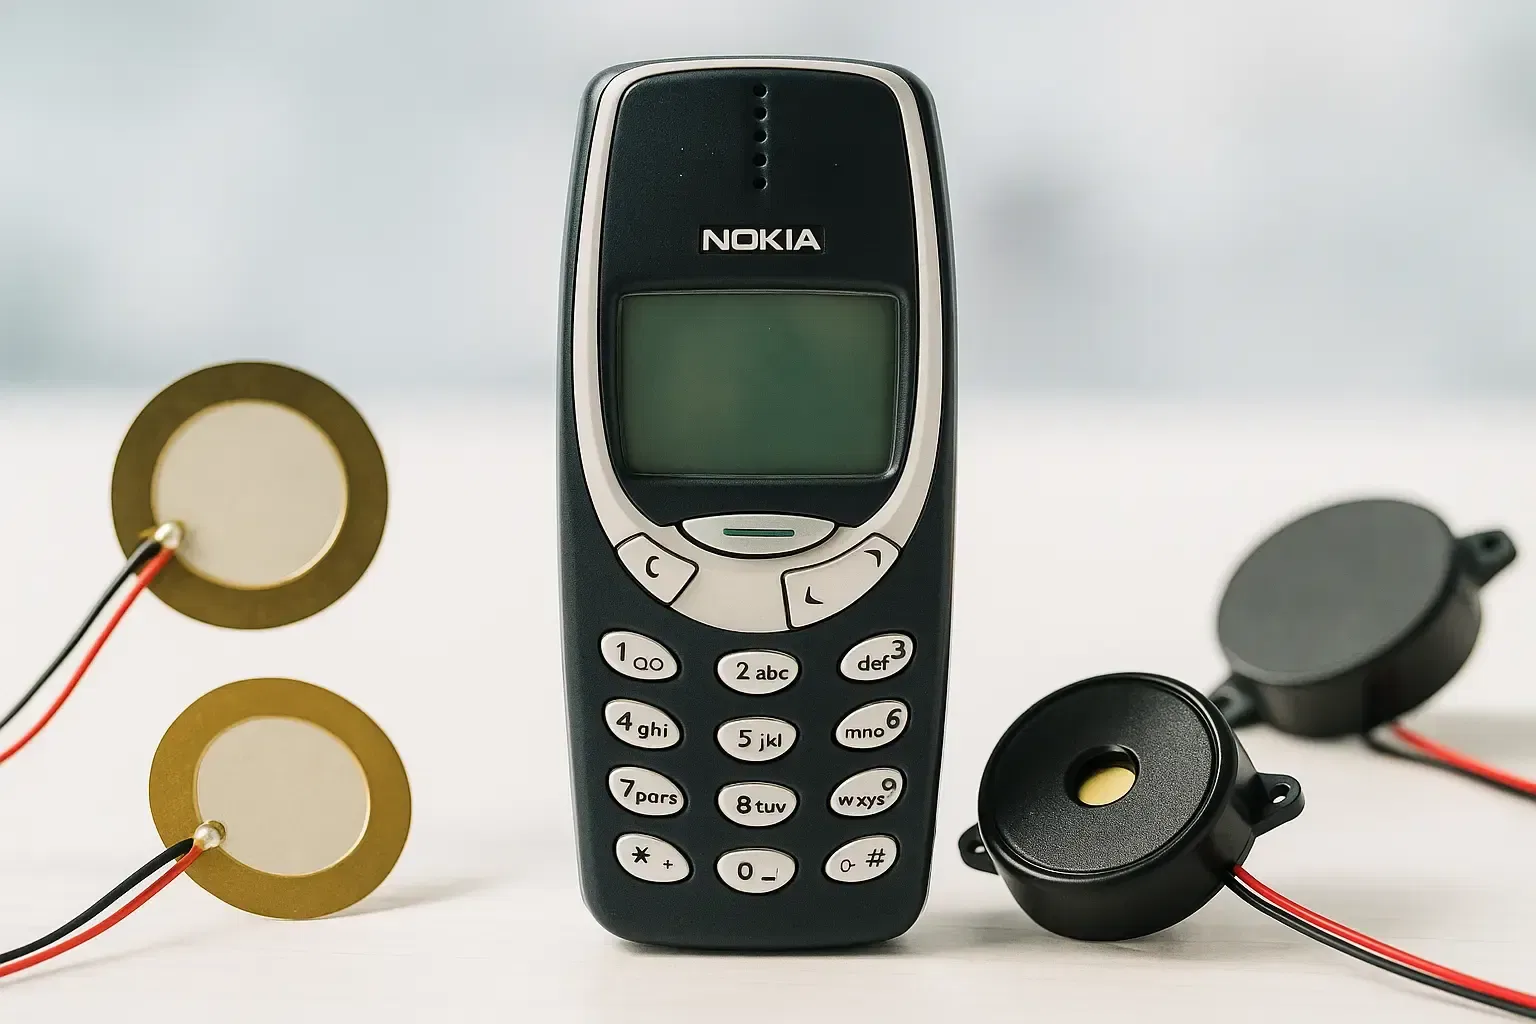
Remember the days of classic Nokia phones — the ones with monophonic ringtones that you could compose using a keypad or even a text-based ringtone editor? Those simple, beeping tunes were driven by the same kind of component we’re talking about today: the piezo buzzer.
Piezo buzzers are the unsung heroes behind those nostalgic tones, responsible for turning simple electrical signals into audible sound. Whether it’s a countdown timer, a smoke alarm, or a microcontroller project playing a short melody, piezo buzzers are incredibly useful and fun to experiment with.
In this article, we’ll dive into how these tiny sound-makers work, how to identify the passive type, and how to use them in practical DIY projects — including how to make your microcontroller sing like your old-school phone.
1. What is a Piezo Buzzer?
A piezo buzzer is an audio signaling device that uses the piezoelectric effect to generate sound. It contains a ceramic piezo element that changes shape when voltage is applied, causing a diaphragm to vibrate and emit sound. In addition to producing sound, the piezo element can also generate a small voltage when it is mechanically deformed—such as when pressed, struck, or vibrated—making it useful as a vibration or impact sensor.
They are known for:
- Low power consumption
- Small size
- Wide voltage compatibility
- High reliability

2. Understanding Passive Piezo Buzzers
Passive piezo buzzers do not generate sound on their own. They require an external signal — usually a square wave — to create vibrations that produce sound. This makes them highly versatile for projects that require varying tones, such as melodies or feedback effects.
How to Identify a Passive Buzzer
- Usually lacks “+” or “–” polarity markings
- Does not produce sound if connected directly to constant voltage
- Often labeled as “passive” in product descriptions
Note: You may also encounter active piezo buzzers, which contain a built-in oscillator. These buzzers produce a fixed tone when powered with DC voltage and are commonly used for simple beeping alerts. However, they cannot play varying tones or melodies — unlike passive buzzers, which offer much more flexibility for projects involving sound control.
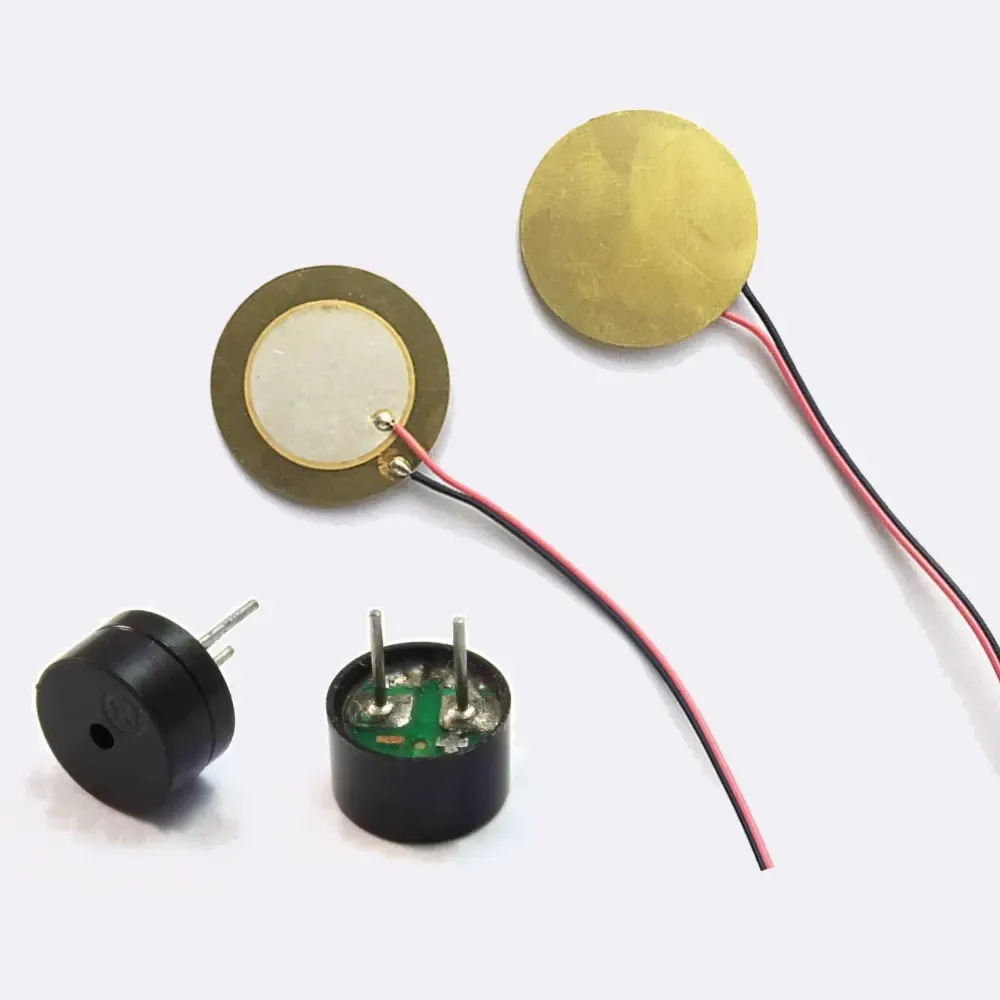
What Do Red and Black Wires Mean?
Many passive piezo buzzers (especially those in plastic housings) come with red and black wires:
- Red wire: Typically connects to the positive side (PWM signal or VCC).
- Black wire: Connects to GND.
While bare piezo discs are non-polar and can be connected either way, pre-wired modules sometimes include extra circuitry like a small amplifier, making polarity important. When in doubt, check the datasheet or seller specs, but generally, red = signal, black = ground is safe to follow.
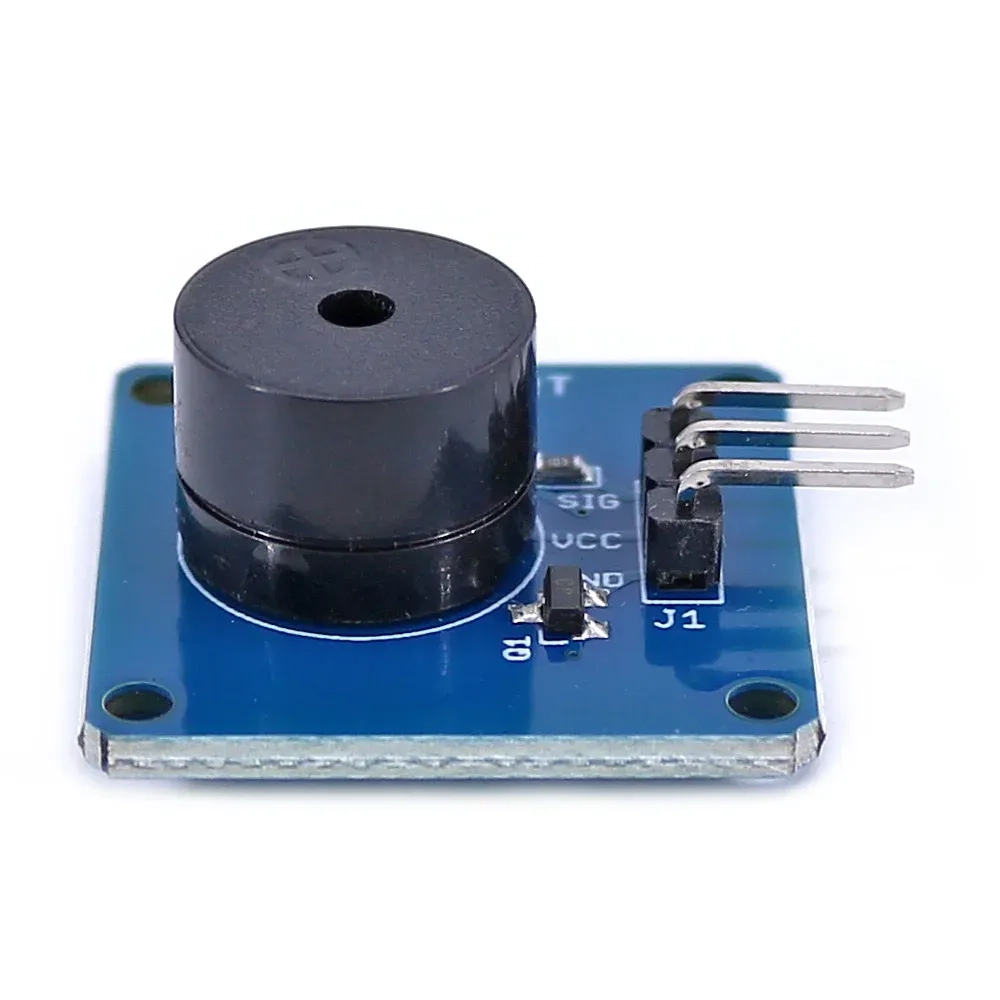
Note About 3-Pin Piezo Buzzer Modules for Arduino
Some piezo buzzer modules designed for Arduino come with 3 pins:
GND, VCC, and S (signal).
In most of these modules, the S pin connects directly to the buzzer element, while VCC is sometimes used only to power an onboard resistor or LED for indication. You can usually treat these like passive buzzers and just connect GND and S as you normally would.
Tip: Unless the module’s datasheet says otherwise, you can ignore the VCC pin and connect only GND and S to your microcontroller.
3. How Piezo Buzzers Work
The working principle is based on the piezoelectric effect. A piezoelectric crystal expands and contracts when voltage is applied. When bonded to a metal diaphragm, these mechanical vibrations produce sound waves. The frequency of the voltage signal determines the pitch of the sound.
Because passive buzzers need a signal to function, you can control the pitch, duration, and rhythm — making them perfect for things like melodies or tone-based feedback.
4. Wiring a Passive Piezo Buzzer
To use a passive piezo buzzer in your project, you need to supply it with a pulsed signal — often from a microcontroller like an Arduino.
Basic Tone Example
1int buzzerPin = 9;23void setup() {4 pinMode(buzzerPin, OUTPUT);5}67void loop() {8 tone(buzzerPin, 1000); // Generate a 1kHz tone9 delay(1000);10 noTone(buzzerPin); // Stop the sound11 delay(1000);12}13
Nokia Ringtone Example (Played on Button Press)
Let’s bring back some nostalgia by playing the classic Nokia default ringtone using a piezo buzzer. This example waits for a push-button press (connected to pin 2 with internal pull-up), then plays the tune twice through a buzzer on pin 8:
1// Only needed notes2#define NOTE_CS4 2773#define NOTE_D4 2944#define NOTE_E4 3305#define NOTE_FS4 3706#define NOTE_GS4 4157#define NOTE_A4 4408#define NOTE_B4 4949#define NOTE_CS5 55410#define NOTE_D5 58711#define NOTE_E5 6591213const int buzzer = 8;14const int button = 2;15const int tempo = 180;1617struct Note {18 int frequency;19 int divider;20};2122// Nokia ringtone melody23Note melody[] = {24 {NOTE_E5, 8}, {NOTE_D5, 8}, {NOTE_FS4, 4}, {NOTE_GS4, 4},25 {NOTE_CS5, 8}, {NOTE_B4, 8}, {NOTE_D4, 4}, {NOTE_E4, 4},26 {NOTE_B4, 8}, {NOTE_A4, 8}, {NOTE_CS4, 4}, {NOTE_E4, 4},27 {NOTE_A4, 2}28};2930const int numNotes = sizeof(melody) / sizeof(melody[0]);31const int wholenote = (60000 * 4) / tempo;3233void setup() {34 pinMode(buzzer, OUTPUT);35 pinMode(button, INPUT_PULLUP);36}3738void PlayNokiaMelody()39{40 for (int i = 0; i < numNotes; i++) {41 int divider = melody[i].divider;42 int noteDuration = (divider > 0) ? (wholenote / divider) : (wholenote / abs(divider)) * 1.5;43 tone(buzzer, melody[i].frequency, noteDuration * 0.9);44 delay(noteDuration);45 noTone(buzzer);46 }47}48void loop() {49 if (digitalRead(button) == LOW) { // Button is pressed50 // Play melody twice51 for (int repeat = 0; repeat < 2; repeat++) {52 PlayNokiaMelody();53 delay(1000);54 }5556 // Wait until button is released to avoid retriggering57 while (digitalRead(button) == LOW);58 delay(200); // Simple debounce delay59 }60}61

Want to play more songs?
If you're interested in playing even more tunes on your piezo buzzer, check out this fantastic open-source collection of Arduino melodies on GitHub:
https://github.com/robsoncouto/arduino-songs
It includes a wide variety of melodies from video games, movies, and more — ready to use with your Arduino projects.
5. Applications of Passive Piezo Buzzers
- DIY music tones and melodies
- Beep feedback for user interfaces
- Sound alerts in sensors and embedded devices
- Educational toys and Arduino projects
- Alarm buzzers with custom tone logic
6. Using Piezo Buzzers as Sensors
Piezo elements can also act as sensors, not just sound generators. When subjected to mechanical stress — like vibration, tap, or knock — the piezoelectric material generates a small voltage. This allows you to use them for:
- Tap or knock detection
- Vibration monitoring
- Impact sensing in security systems or machinery
- Drum pad triggers in musical instrument projects
By connecting a piezo disc directly to an analog or digital input pin on a microcontroller (with a resistor and capacitor for signal conditioning), you can detect voltage spikes caused by physical interaction.
Tip: Use a 1MΩ resistor in parallel with the piezo disc to stabilise voltage, and consider adding a zener diode to protect your input pin from voltage spikes.
7. Pros and Cons
Pros:
- Inexpensive and widely available
- Full control over tone frequency and duration
- Small and lightweight — great for compact circuits
- Extremely low power consumption
- Can also be used as vibration/tap sensors
Cons:
- Requires a controller or oscillator to function
- Produces simple, low-volume sound only
- Not suitable for rich audio or music playback
- Needs programming logic or external circuitry to generate tones
Conclusion
Passive piezo buzzers offer a fun and flexible way to generate sound in electronics projects — and even act as sensors when reversed. Whether you want to play nostalgic ringtones, build musical projects, or detect vibrations and taps, these compact components pack a lot of functionality. All you need is a microcontroller and a few lines of code to bring your ideas to life.
Related Topics:
Discover what flyback diodes are, how they work, and why they are crucial for protecting your circuits from voltage spikes caused by inductive loads like motors and relays.

Discover how 7-segment displays work, their internal structure, types (common anode vs cathode), and how to use them in Arduino projects. Perfect for beginners and electronics enthusiasts.

Learn how push buttons work in digital circuits, including pull-up and pull-down resistors, and how to handle switch debouncing using both hardware and software techniques. A must-read for electronics beginners and Arduino enthusiasts.
Or you can explore other categories

Electronics